Showing posts with label martha stewart punches. Show all posts

Thursday, September 17, 2015

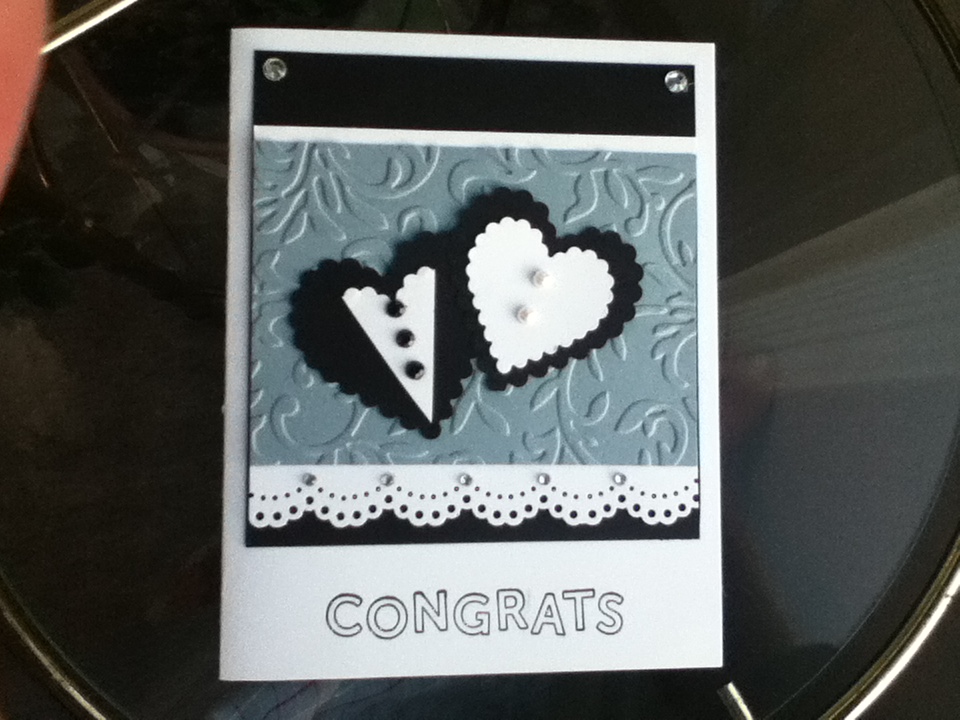
Classic Wedding Card

So Simon Says Stamp blog has a challenge to use our favourite technique. That's an easy one for me -- embossing. Dry embossing with my Cuttlebug. I love texture on cards and projects -- and embossing folders make that happen so easy and fast!

Here's my card for the challenge:


Thanks for stopping by. :)

challenges: Simon Says Stamp -- Favourite Technique.
aud sentiments challengeblog - anything goes plus sentiment
crafty-girls-creations -- anything goes

Wednesday, February 25, 2015

Scraps of Paper

Hi guys. I have another card to showcase using the Stampin Up "Thoughts and Prayers" set. Have I mentioned that I LOVE this stamp set?!!! LOL

I'm trying to use up some scraps of designer paper from my stash...so I tried to incorporate some designer paper into my card. It turned out well, I think.


I stamped the cross image on some white cardstock and fussy-cut around it. Then put it on some dimensionals. I also stamped the sentiment on some vellum paper and put it over the cross. I love the look of vellum on cards! And this is a great way to clean up vellum scraps as well. :)

I used a  double edge border punch from Martha Stewart called " Doily Border" and added some bling to the center of the flowers. Sweet and Simple card. :)


Some challenges:


Wednesday, January 14, 2015

Masculine Tree

Over at the Simon Says blog they're having a Masculine card challenge. We all know just how difficult masculine cards can be to create (adding flowers, bows, and using colorful and femine paper is so much easier!) ...

...but I'm getting better at these masculine cards. It's a learning curve...

Today's card features another stamp from the "Thoughts and Prayers" stamp set by Stampin' Up. I absolutely love trees on masculine cards -- there's something about trees...


Sometimes the cards turn out to be monochromatic...when you truly didn't intend to create one! But shades of brown are so fun to work with...and calming... (I LOVE BROWNS!)


Here's a look at the full card:


The border punch is one of my favorite by Martha Stewart. The ribbon is from Simon Says store (I think)...and of course some pearls. :) You gotta love bling...of any kind! :)

So anyways, I'm off to get some other projects finished. Thanks for stopping by my blog...and have a great day! :)


Monday, January 12, 2015

Color Stamping Technique

I love trying new things. Not just when it comes to scrapping, but in general. Show me an idea...and if it's something I'm interested in, I'll no doubt try it myself...if I have the supplies. :)

I saw this stamping technique done by Gina K. on her video tutorials...and I absolutely loved it! But I just didn't have any stamps that would work for it. Today I borrowed this lovely Stampin' Up set (I absolutely love their stamps!) and finally tried it myself.

The technique is very simple.

Get a rubber stamp that requires no black lines to define it....


some Copic markers (or a similar type marker),


and some paper to apply it to. Then you color directing onto the rubber stamp with the Copic markers. Yes, I said the STAMP, not the stamped image. Color the stamp till it is completely covered with ink...


 and apply to the paper. You should get a perfect colored image...with no black lines. :)


Pretty cool! :)

So here's a look at my card:


Thanks for stopping by today. Have a good and crafty day! :)


Challenges:
 Ladybug crafts -- say it with flowers

tuesday throwdown -- fav embellishment ( ribbon)
RRR -- Use Ribbon
scribble and scrap crafts -- anything goes
Jan link challenge -- anything goes
nbus - never been used schtuff -- anything goes (ribbon is brand new)


Tuesday, August 5, 2014

Mini Album

Hi guys. Today I want to show you a project I've been working on the last two days. I found this great tutorial for a mini album on Pinterest. I've tried making a mini album in the past (love the whole idea of it cause it's like a mini scrapbook...with a twist...cause you have to actually open flaps and stuff)...and they're so cool! ...but they never turned out quite like I imagined. This project was by far the easiest mini album I've tried so far...and I absolutely love the final result. :)

I used a Stampin' Up paper pack that I've had in my stash for awhile now. It was perfect...and I love all the different papers. The ribbons are also from my stash (some are Stampin' Up, some are just from the local Dollar Store). And of course I had to use some border punches. I think these ones are called "Arch Lattice" by Martha Stewart and "Daisy" by Fiskars.

So here's a look through the mini album. I'll more than likely add more embellishments once I add my photos...but I think you'll get the general feel of the album.

This is the front. It's still missing the title and the photo...

The first fold opens upward:

There are two pockets along the side that holds the two photo mats. The mats themselves are double sided...so there will be a total of four different photos.

On to the second "page"...
         this tag and photo mat are stuck down...so no removing...

but then you flip up the right side...to find two more photo mats.

Moving on to page 3...
     This is the most "hand's on" page. It has three different pockets that hold either tags or photo mats.

First off...there's a big photo mat in a pocket on top of the left page. This mat is double-sided...so there will be two big photos.

Then there's obviously the two tags in the front of the left page. The tags have space for a photo in the back...which I'll probably end up turning around. So my photos will be shown...with journaling on the back. But I figured with no photos to display yet...I'd show the "journaling" side of the tags.

Finally, there's a two-sided photo mat in a pocket on the right page as well. Space for two different photos.

And when you close the book...this is the back view.


Have I inspired you to try one of these for yourself? Here's the link to a great tutorial. It's not complicated at all...and it's made from a basic 12x12 sheet of paper (cardstock or printed -- though I'd suggest you go with a two-sided thicker paper 'cause then you have the background papers already there...and just have to add the tags and the embellishments.) But that's all up to you. :) Enjoy! :)


Challenges:

Wednesday, May 14, 2014

White on White


Hi guys. I absolutely love the look of the White on White cards, but I've only ever succeeded at making ONE! Why? Mainly because I like contrast...and white on white cards don't exactly have a whole lot of that. :p  So even if I start out with a white on white card, I somehow always add a splash or a touch of color...

Today I decided to really challenge myself. Create a White on White card with absolutely NO other color (except the black used to stamp my sentiment). Amazingly it actually wasn't that difficult...and I used up a few scraps from my bin at the same time! Win - win! :)

Here's my card:


close up of the details:


So that's my card for the day. Thanks for stopping by...and have a great day! :)


supplies used:
White cardstock
Martha Stewart butterfly punch
Vintage Label Die
Victorian Cuttlebug folder 
Stamp from Michael's
white bling


challenges:


Wednesday, April 10, 2013

For a Loss

Hi guys. It's been a sad week. One of my friends lost a baby girl this week. I can't image how hard that must be...to let go after waiting for so long! It makes me hold my little guy just a little bit tighter and a little bit longer...and be thankful for his cute little smiles even more.

Of course I had to sit down and make a card to send my friend some encouragement...cause I couldn't be there right now. It turned out sweet...


I used a new Cuttlebug folder called "Kimberly's Card". It's very pretty...and I love the border it leaves where you can add a sentiment. It makes card making so fast and easy. I stamped a sentiment from a sweet sympathy stamp set from Michael's. Finally, I added a butterfly punch. I love the softness of the card -- subtle, yet classy. :)


supplies:

Kimberly's Card embossing folder
Martha Stewart Butterfly punch
Clear Stamp from Michael's (not sure of the stamp set name)


challenges:

Monday, March 11, 2013

Twig-y Ocassion


Looking for my blog candy??? 
Click HERE. 


Hi guys. I love punches!!!!!! They're awesome -- make card making so fast and easy when you can punch a pretty design or add detail to a card with a few simple "squeezes" instead of having to spend hours cutting little pieces like I used to do when I first got started scrapbooking and card making. Oh how things have changed...but I'm loving all the new supplies and techniques...so no complaining coming from me!!!!!!! LOL

So now that I've shared my punches obsession :p ...I guess I should move on to my card.

As you've probably already guesssed...the card features punches. LOL And here it is:


I was debating on whether to add a sentiment or not, but I couldn't decide where to put it, so I left it without. I like having cards that you can use any occasion....and this one is perfect for that. :)


supplies used:
Fiskars scalloped square punch
Martha Stewart twig punch

Wednesday, November 28, 2012

Season's Greetings

Hi guys! I've loved working with Inkadinkado clear stamps this Christmas time. I've finally figured out how to get a clear and crisp image every time...and now there's no stopping me when I get started with stamping...

but as long as cards are being made, all is good, right? :p


I'm not a big fan of the "Season's Greetings" expression -- I like the good old "Merry Christmas". The Christ-child is a big part of the Christmas season (He is after all the whole purpose behind the season). But I liked the look of this stamp and decided to make one card using it.

I added a punched border  to make things a little bit interesting. Love the bit of extra the border punches add to cards...


Finally I added a border of punched snowflakes to the bottom of the card, 'cause it was looking a little bare. Added some bling to spice it all up...and the card was complete. :)


Thanks for dropping by my blog today. Hope I've inspired you  a little bit. :) Have a blessed day. :)


challenges


Tuesday, September 18, 2012

Another Wedding Theme

Hi guys. It's been awhile since I've posted...buy it's summertime...which gets really busy around here...and there's not a whole lot of time spent at my crafting table. But every now I then, when I need a break from the other activities and stuff, I head on over there and make a card or two.

Here's one I lifted off a wedding card I found online. I loved the idea of the hearts being the bride/groom, etc.


 I must say, it turned out better than I thought it would -- even if I only had a Scalloped Heart punch and I wanted a plain-edged heart. It worked out either way. :)


Thanks for  stopping by. Hope your summer is fun-filled...just like it's suppose to be :)


Wednesday, May 23, 2012

Birthday Masculine

Hi guys. Today I have a masculine birthday card to share. Masculine cards, in general, seem to be everyone's most challenging cards to create. I find little boys' cards to be pretty simple, cause you can add a cute animal image and it works. But when you start making cards for adults, it gets a lot harder. Especially when you try a card without a coloured image (which isn't really my style in the first place).

So when I set out to make masculine cards (for older guys)...I like to keep them Clean and Simple for starters. I often look if I can find a sketch online to use, which I did in this case. And when I finally do find something that turns out really really really well, well I mass  produce! :p LOL Different colours, different stamps, etc.  -- but a great sketch is dying to be mass produced! And when it comes to masculine cards -- a GREAT card is hard to come by, so why not?!!!

On to my card:


The cardstock is from a Michael's pack. The border is from a Colorbok paper pack I won awhile back. I love all shades of brown and this Paper pack was my favourite from Colorbok so far! Beautiful papers!!! (I only have scraps left, but that was perfect for this card, as all I needed was a scrap). :) The square stamp is from the Dollarama -- I haven't found a whole lot of uses for it yet, but I do love it for Masculine cards. And finally the two sentiments are from the Upsy Daisy stampset I borrowed from a friend.

I love how all these different products work together. :) And yes, I am definitely mass producing this card!! I love it! :)


Just Tracy's Crafts Challenge -- Anything Goes
Simon Says Stamp Challenge -- Father's Day/ For a Special Male
Sweet Stamps -- Anything goes
Mojo Monday -- Sketch
Creative Inspirations -- Anything Goes

Friday, June 24, 2011

ConGRADulations

It's that time of year ago -- lots of graduations happening. And of course, we all need a card to help mark the occasion. :) My little sister is graduating this year (man I'm getting old!!!!) and she wanted some grad cards to send to fellow classmates and friends.

I borrowed a Martha Stewart border punch and the owl stamp from a friend...and set to work. This is the best punch I've used to date -- definitely the next one I'm buying for myself! I absolutely loved working with it! :) Anyways, I made a half dozen similar cards -- only different colours.  And now they're all ready to be sent off! :) TFL


KB Cute Mondays: Use Fav Embellishment -- I can always find space for BLING!
 

Sunday, January 9, 2011

Double Butterfly

And I'm off with my card making for 2011!!! :)

 This card is actually for a card lifting group I joined -- you get a card to "lift" or copy...once a week, and see what you come up with. One of the best parts is making the original card idea into something entirely your own. For the most part, it's made me think outside the box -- because soooooo often the cards we are lifting are totally not my style!!! But it keeps things interesting -- and keeps me challenged. :p

This is the latest card I made -- LOL -- about the only thing that I lifted from the original card was the half circle in the center. I love how it turned out though...


 >> used all supplies from my stash.

Friday, October 29, 2010

When Sketches Work

I have a folder on my computer with sketches for layouts that I want to try. When I run out of ideas of my own, I head to the folder to see if I can be inspired. I've had this certain sketch that I absolutely love -- but it just never fit with any of the photos I was scrapping.

I wanted to scrap a postcard from a trip to South Dakota way back in 2004. As I was browsing through my folder, I found this sketch...and immediately knew it would work. It's simple, but I love it! :)


I borrowed a Martha Stewart border punch, and used a Fiskar border punch as well. Added a new ribbon from a recent RAK win, and the layout was complete. I love it!!! TFL


Challenges: A Spoon Full of Sugar: Let's Get Punchy

Friday, October 22, 2010

Bring on the Snow!!!

No -- I don't want winter to arrive yet...but I figured the title worked great with the card! LOL I'm enjoying our Indian Summer -- although it has cooled down here recently...and there's a chance of flurries in the next few days!! :(

I've been wanting to get started on some Christmas cards in the last month, but I've been waiting for some inspiration! Today I found a freebie (the big snowflake) on a blog site, and decided to try making a card with it. Totally non-traditional colours, but somehow shades of blue always work with snowflakes.


I'm not totally impressed with how the card turned out, but it's okay. I loved working with the Martha Stewart border punch. I really need to get one of those for myself -- I love it!!! :)  TFL


Challenges:
Dottie's World -- Christmas Card, Anything Goes
Sarah Hurley -- Xmas Card -- Red & Green Must Not Be Seen!
Delightful Challenges: It's Beginning to Look A Lot Like Christmas
Karber Christmas Challenge: Use A Digi
Crafty Cardmakers -- Use A Freebie
Pear Tree Designs -- Free For All